Nook Color CM7 Review & How To

What is Nook Color CM7?
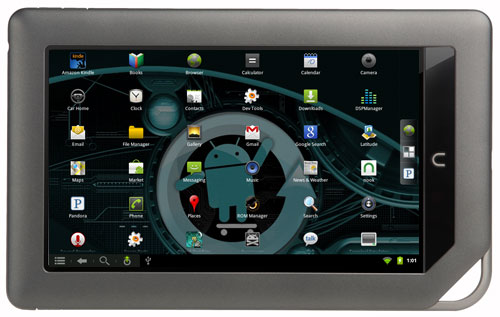
CM7, aka CyanogenMod 7, is a popular alternative firmware for several Android devices, and luckily the Nook Color too. With CM7 installed, the Nook Color is far more advanced and can do many more things than with the original firmware from B&N. This tutorial will show you how to install CM7 on your Nook Color in a few quick steps, including how to install the Android Market and Google apps pack.
You can choose to install CM7 on the Nook Color's main memory if you don't want to keep the Nook's original functionality, or you can simply install CM7 on a microSD card and run it from there. Take the card out and you're back to your stock Nook Color. This requires no hacks, roots, or anything like that.
I'd suggest using the SD card method so you can easily change between the Nook's normal state and the CM7 ROM. That way you can still use a Honeycomb ROM or other ROM too. If you want to install CM7 on the internal memory, follow these directions at NookDevs.
Nook Color CM7 Video Demo
Nook Color CM7 SD Card Install Directions
1. The first step is getting a 1GB or larger microSD card that you don't mind erasing—the size will determine the partition layout. I'm using a really cheap Sandisk 2GB card for this review and it runs surprisingly well, but the bigger the card, the more space you'll have for apps and content. A 8 or 16 GB card is probably the best to go with, depending on how much space you need.
2. Download the latest installer image from over at the XDA forums. You can follow those direction instead of these for more technical details. They are the directions I used, but I thought I'd write it simpler over here for us non-developers.
3. Unzip the install file on your computer's desktop and then burn the image to the microSD card. Mac and Linux users can apparently accomplish this with "dd". I have Windows and used a program called WinImage, which has a free trial. Last time for the Honeycomb ROM I used Win32DiskImager. Both will do the job. With WinImage, open it up (as administrator with Vista), click Disk, then select "restore virtual hard disk image on physical drive". Select your SD card from the list (make certain it is the right one) and hit OK. Select the image file (generic-sdcard.img) that you unzipped to your desktop (I had to select "all files" in the drop-down to get it to show up). Hit "Yes" and it will write the image to the memory card.
4. Next, download a Nook Color CM7 build; there are several to choose from. The latest stable version is probably the best to go with (perhaps not, see update below) since all known issues have been fixed. Nightly builds contain the latest features and tweaks, but are more likely to have bugs and issues. For this review, I used the latest nightly build. Once the file is downloaded, don't unzip it. Just drag it onto the main root folder of your new CM7 memory card as is.
5. Shut down your Nook Color. Insert the CM7 SD card and turn the Nook Color on. Pretty soon a little penguin will appear in the upper-left corner and a bunch of code will process for a few minutes. The screen will go completely black after some time. That's it. Power the Nook Color back on and CM7 will automatically run from the microSD card. Just remove the card to go back to your regular Nook (make sure to shut down first).
Note: Because of licensing restrictions, Google Apps—Gmail, Maps, the Android Market, etc—don't come pre-installed on CM7. You have to install them separately using the method below.
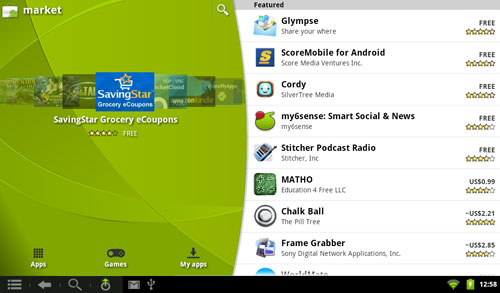
How to Install Android Market and Google Apps on Nook Color CM7

1. Before doing this, run CM7 on your Nook Color at least once to setup WiFi (go to settings, wireless). Once that's good to go, power the Nook Color down and uninstall the CM7 microSD card.
2. Download the Google Apps pack for CM7. The latest version can be found here.
3. Once the file is downloaded, don't unzip it. Place it on the root folder of the CM7 memory card as is like you did with the CM7 build file.
4. Now you need to boot the Nook Color in "Recovery Mode". The directions at XDA say to hold down the "n" nook key and power button for about 6 seconds to turn the Nook on, then release. This can be very tricky; timing is everything. If it doesn't work, let CM7 boot normally and then once it gets to the homescreen, hold down the power button and select Reboot, then Recovery, then hit OK. You know you are successful when the little penguin pops up in the left corner again after it reboots. After that finishes the screen will go blank again. Turn the Nook back on and it's good to go. Follow the on-screen directions for the Google apps. If you hit any snags just turn it off and then back on again, sometimes it has to reboot again before everything works properly.
Update: I have since tried this method of installing Google Apps again 4 months after initially posting this, but to no avail, the Nook Color won't boot in recovery mode with certain versions of CM7, not even from the reboot menu. I couldn't get the latest stable version (update-cm-7.0.3-encore-signed.zip) to boot in recovery to install Google Apps, but could using the method above with a nightly build. If you are having troubles, try starting over with a nightly build instead, an earlier stable build, or you can just get a N2A card with everything already setup and ready to go.
Nook App for Android
Once you have CM7 installed on your Nook, you can only access the Nook's original features and reading app by removing the SD card. One alternative is to install the Nook Android app onto CM7. Most of the same features apply as with the Nook Color's built-in reading functions, but there are some differences. For one, enhanced ebooks and Nook Kids ebooks won't work in the Android app. On the flip side, the Android app has some extra features, such as landscape mode, with one and two column view. There's even fancy page-turn animations. It's strange that those aren't included with the Nook Color's regular reading app.


